

The first place Ben decided to start work on was this bank of cabinets, it was a large area with lots of doors and drawers, but nothing too tricky. So he took off all the d&d's and began sanding, I jumped in with helping prime and paint the framework when possible. Then Ben sprayed the d&d's outside.


When my dad saw that we had begun work, he immediately volunteered to come over and help rip out the short cabinet and replace the lighting.


Buh-bye ugly florescent lights!

The ugly box light over the sink had a surprise for us, a nice big hole that would need patching!


Unfortunately there was a lot of drywall that needed patching and the whole box inside where the florescent lights were needed texturing. The good news is we had a fabulous little helper!

She even brought her own tools!

I decided I wanted to hang pendant lights above the now open counter area. So we devised a way to figure out their placement and the length we wanted.

We took the light junction boxes and taped them to the ceiling then we hung paper plates with a bottom circumference the same size as the future pendent lights. This allowed us to move them around and figure out exactly where we wanted to place them.

Then the guys cut the holes for where they would mount them.

And they cut the holes for all the new LED can lights.

Then they applied "mud" or joint compound to the ceiling to give it that lovely orange-peel texture that all the houses around here have.

We didn't want the rest of the house getting messy so they hung up lots of plastic.

And because we removed all the lights in the room they had to get creative when the sun went down!

Such a great team! I'm so lucky to have such great guys!!!

Then came wiring! We connected the new pendent lights to the same switch that the light over the sink is on.

Helper always at the ready!


Hooray the new pendent lights are up, we have light!!!

Running the wires was tricky because of all the support rafters, they had to go up and over and in and out of the itchy insulation, but they did it!

And look at that result!!!
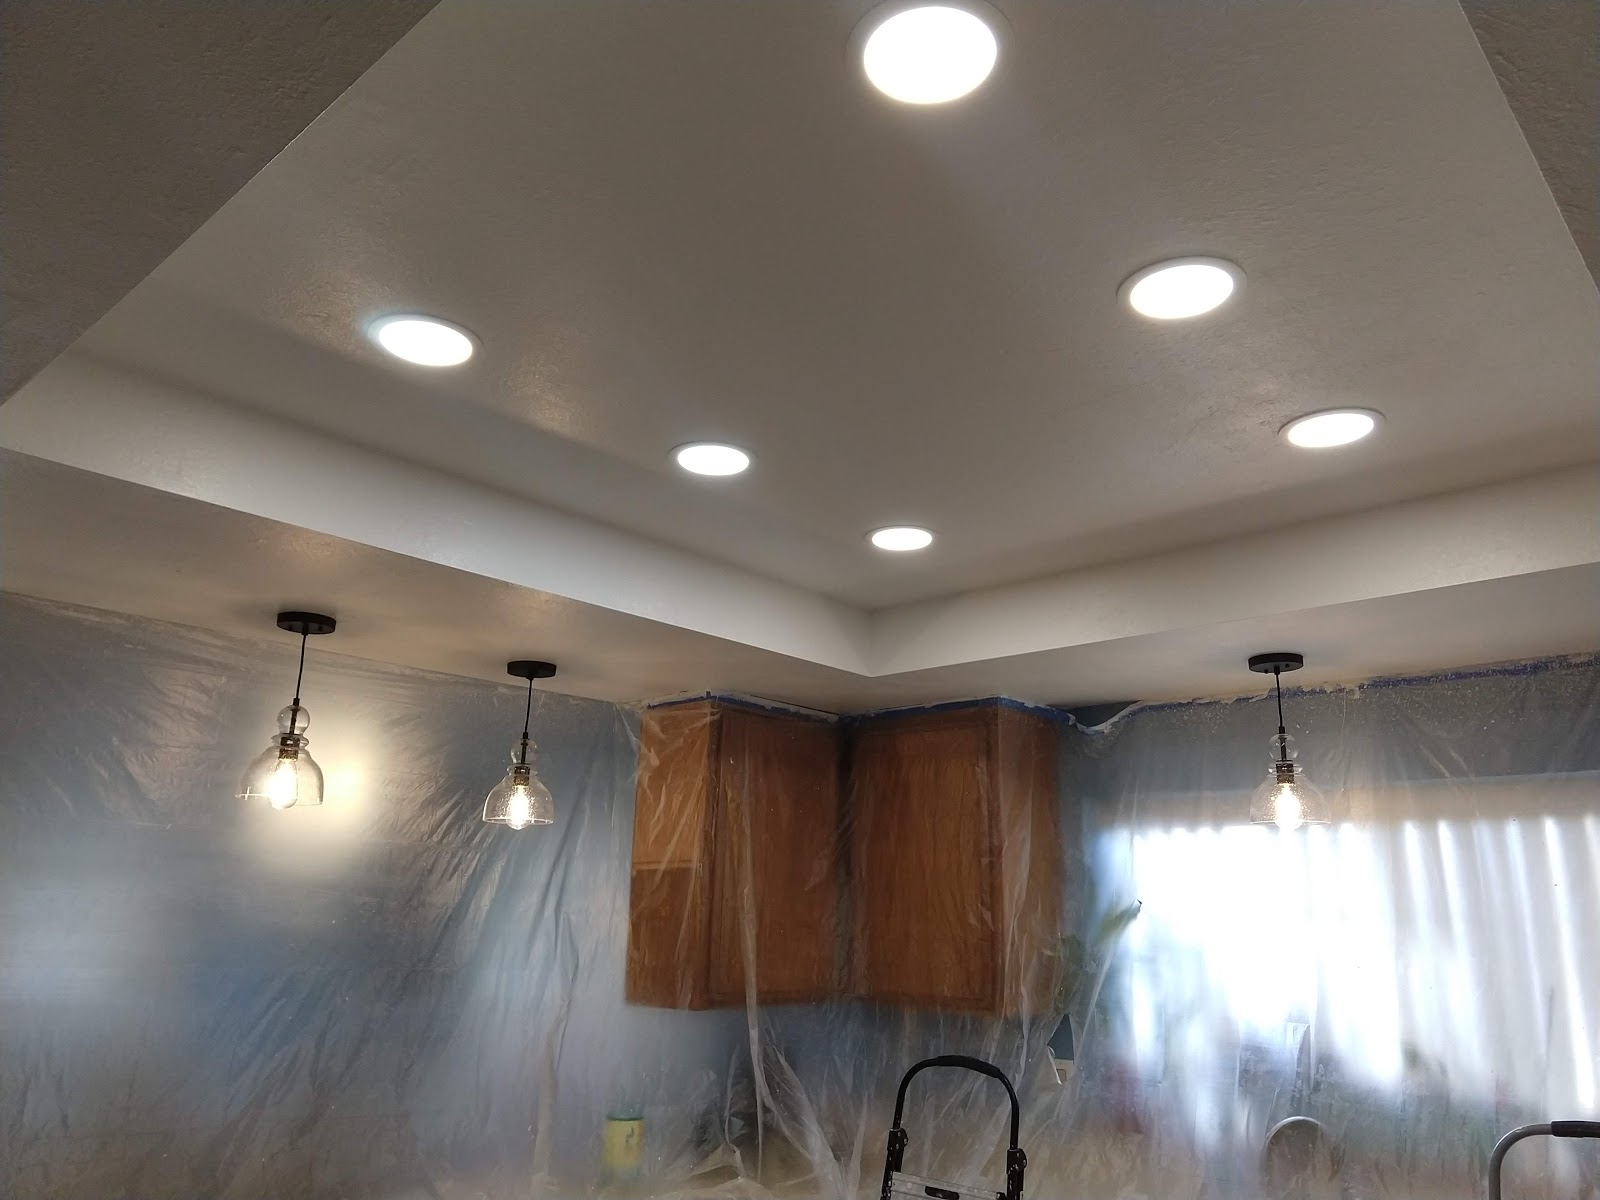
Now the plastic could come down, dance party!!!


And I couldn't let him go home without installing my new hood for over the stove. The old one was a lovely shade of yellow that could not stay once the cupboards got painted white.

Ooooo white!

The box claimed one person could install it on their own, hahaha! Yes, with their EZ mount brackets it could rest in place, but really this job definitely needed two people to get it done.


Another progress shot for you.


Yay more progress! I've also been making progress updates on my Instagram stories and even have a story section all on our progress saved on my profile, you can check that out here @clearwatercottage
Just look for the little circle called Kitchen Reno.

And that's where we have left off for now. We still have a lot more to paint and I have dreams of building a cover to go over the hood to make it look like a built-in. We'll get there, maybe by the end of summer we'll be all done.

You're fortunate to be able to do your own remodel. It's looking great so far and I can't wait to see more of the transformation! Visiting from Really Crafty party.
ReplyDeleteThank you so much! Yes I do feel fortunate that I have the help I need in order to do this, for sure I wouldn't have been able to do the electrical on my own!
DeleteWow - that's great Lani! SO nice to have such handy guys and helpers around! I'm really looking forward to the next installment! :)
ReplyDeleteThank you so much! It's been an exciting journey and I'm so grateful for the help I've received!
DeleteThat is looking so beautiful! Keep up the good work.
ReplyDeleteGreat transformation! The lighting you chose looks awesome.
ReplyDeleteOh, that is an amazing transformation! It's all really pretty. And, that "wedding" photo is priceless!
ReplyDeleteWow! I know that you aren't done yet but the place looks better than before already! Removing those overhead cabinets and changing the lights really did help transform the place! Are the rest of the cabinets stained or it's their natural color? The rest of the cabinets and the white countertop looks good already! It reminds me of the design suggestions from https://www.caesarstone.ca/blog/brown-cabinets-with-white-countertops-design-ideas/. Maybe painting the walls and the upper cabinets white while the rest of the cabinets stay brown would have a nice contrast! I'm thinking of your backsplash by your stove. It looks out of place. Will you change it?
ReplyDeleteKeep up the good work, and keep providing your readers with helpful blogs; greetings from Metavurx VR
ReplyDelete