A replacement needed to be built and here is what I made:
We researched documents and plans of period tables, and decided on constructing a sawbuck table with removable legs. I drew up my plans based on our research.
The top would be built of 1x12 pine planks, and the legs of 2x4 pine and fir posts.The tabletop would be made of three panels of 1 inch plank, and the legs connected by a beam of 1x6 pine.
The workbench for this project was none other than the original picnic table we were replacing in camp. It still serves us well on the porch, with the balcony railing to help support and stabilize it. This build was to be done with hand tools. Learning from trouble with a previous camp stool project, I acquired some C clamps to make cutting and mortising more accurate.
To measure and cut the angles of the crossed legs accurately, I created a jig where I used masking tape to mark out a 27" square on my deck. I then placed the lumber across the square at a diagonal, so that it extended out beyond the top and bottom of my square.
To measure and cut the angles of the crossed legs accurately, I created a jig where I used masking tape to mark out a 27" square on my deck. I then placed the lumber across the square at a diagonal, so that it extended out beyond the top and bottom of my square.
I used a metal ruler to trace the line across where the wood intersected
the tape box. When I went to cut the legs down to size, I used my steel
measure to keep my miter saw blade cutting the correct angle.
Checking to make sure the leg angles line up.
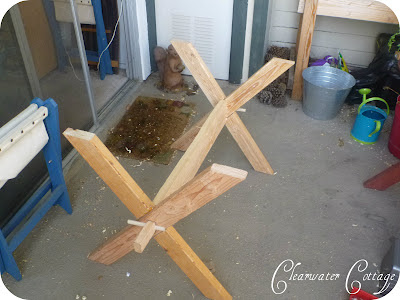
The next step was one of the most difficult parts to get right. I mortised the two legs together, cutting at the inverse angle to the corners, and removing the wood to half way through the leg beam.
Again, clamps made all the difference.
Not quite there yet... Gotta keep chiseling...
Deadlines fast approaching, I borrowed a friend's skill saw and tried to take a shortcut on the other side of the legs...
...and I seem to have earned some negative reenactor karma from this, as my cuts were faster, but not as accurate as my hand-sawn miters. Nonetheless, with the cross legs cut, I hollowed out a hole to mortis the cross beam through.
These were level when I cut the tops and bottoms...
Wiggly wabbly table top!
Lesson learned: if you start a project one way, see it though according to your plan. Changing methods does not get you done faster.
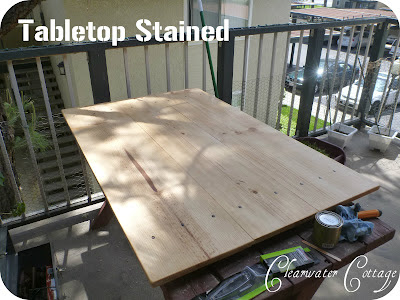
Needing a break from all this sawing, I switched gears and moved to finish the top of the table. I chose a color that I liked, using a Polyurethane varnish that could give the wood adequate protection from its intended use and simulate the looks of period shellac.
Between coats I let the stain/varnish dry, then lightly sanded it with fine steel wool. Then came the second coat.
The cross beam was cut to be the exact length between the support strips under the table top, so as to force the legs to butt up against the strips. The ends were cut down to fit through the mortis holes in the crossed legs. The table is held together here using C-clamps, to test stability.
Now you'll notice in the previous picture the table legs are being held in place with a C clamp. This is not historically correct, therefore I simply drilled a hole through the part of the trestle that comes through the legs. I cut a dowel down to a reasonable length and then shaved off part of the end of the dowel for a tight fit.
Here's a close-up:
Lastly the legs needed to be painted, color of choice: Ordinance Blue (at Home Depot known as St. Francis Blue by Valspar)
See how well it fits in the car! Now we have SO MUCH more room for packing all of our other reenacting stuff!
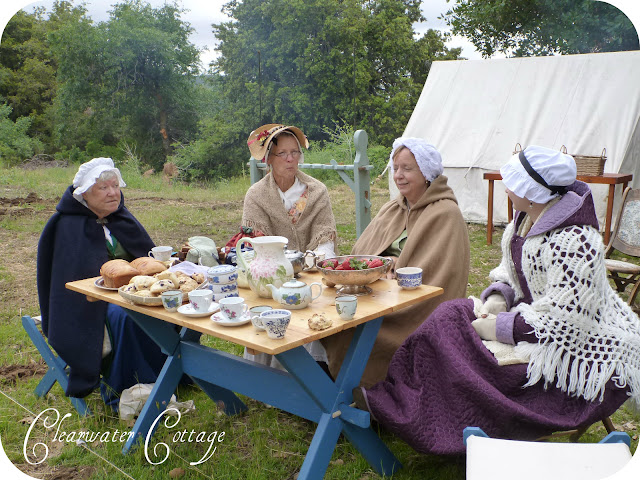
1st official use of the table for the ladie's tea at Colonial Faire.
It can hold tons of food for all of those hungry reenactors.
My wife made me pose for this picture showing off my handiwork.
Cheers,
Benjamin


Bravo, Ben! I still can't believe how much hard work you put into designing & physically making that table. But the quality is evident and shows even through photos! :) I'm sure it will last through many seasons.
ReplyDeleteCheers!
Collapsible Camp Table. As Loni's husband and partner in all things crafty and historical, it is my pleasure to guest-write on the Clearwater ... foldingtablecamp.blogspot.com
ReplyDelete