

This all came about when we recently learned about a law that has been around for a while now, but that the post office has just decided to enforce. If you purchase a home, you need to have your mailbox positioned at the curb - they will not service the one that came with your house by the front door. How did we find out you ask? Well, we stopped getting our mail when the mailman realized new people were living in the house!
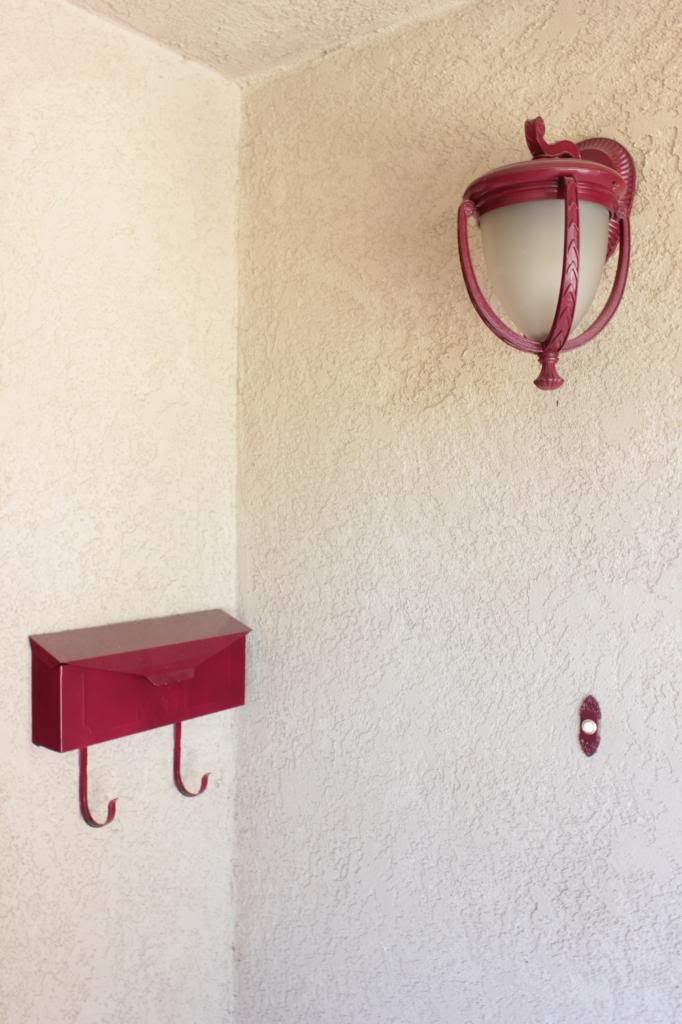
So say bye-bye cute mail box that came with the house.

And that matched the light and doorbell!
And say hello to mastering another project! Step one was to buy a pre-made cedar mailbox post from Lowes.

Because I wanted a locking mailbox that would look cute with our house we ended up with one that did not easily fit on the post. Now we could have bought one that was made of metal and came in a matching beige, but where's the fun in that!?!?!
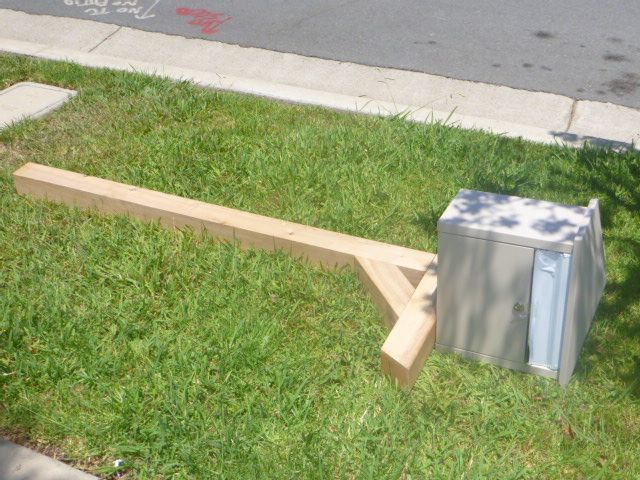
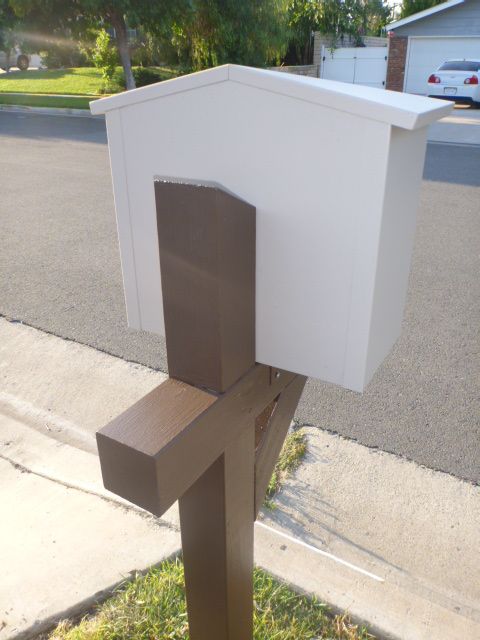
As you can see the arm of the post sticks out way past the mailhouse. Ben simply cut it off at the end of the support bracket, it still stuck out about 2 inches but that actually is nice because it supports the door when it is open.
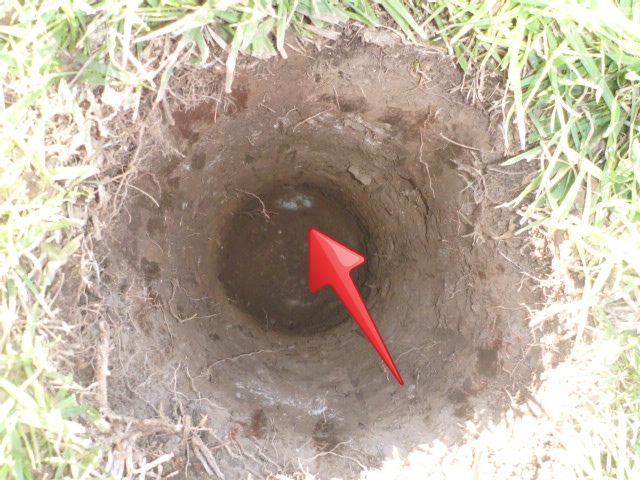
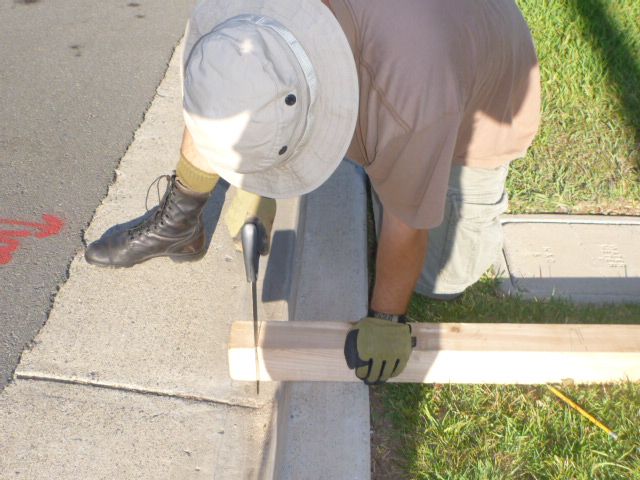
The first task was to dig the hole for the mailbox. Oringinally we purchased a post hole digger from Home Depot for $25 (the cheapest they had), but it didn't feel very strong and we were disappointed that we had to spend so much. Well it's a good thing we frequent the local thrift stores, because one day on Ben's lunch break he came across one for $3! Whoop whoop! And it felt much sturdier than the over priced one!

Using the US Post Office's Guidelines, you can view them here, we measured where we would place our pole and began digging. We placed all dirt into the bucket and ran it to the backyard garden to help fill in some of the holes we have.

The guidelines state that your hole should be 2' deep, our post was a little bit longer than that so we figured we make it a few inches deeper. Well this lil rock decided that was not okay and put a stop to our digging!
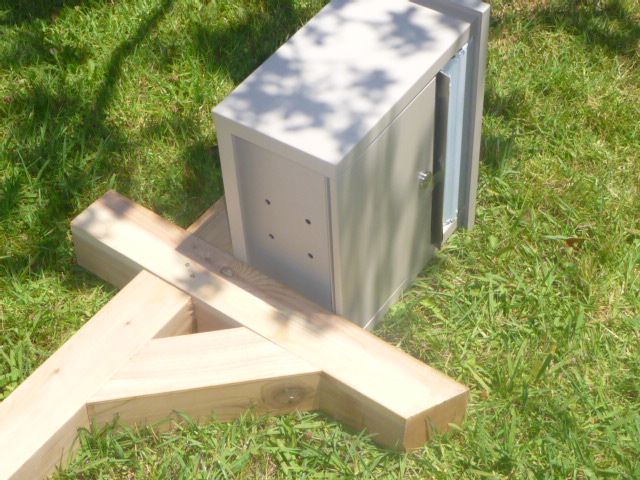
Ben measured and checked our progress... Where the opening to the mailhouse would sit would be kind of high for a postal worker sitting in a vehicle.
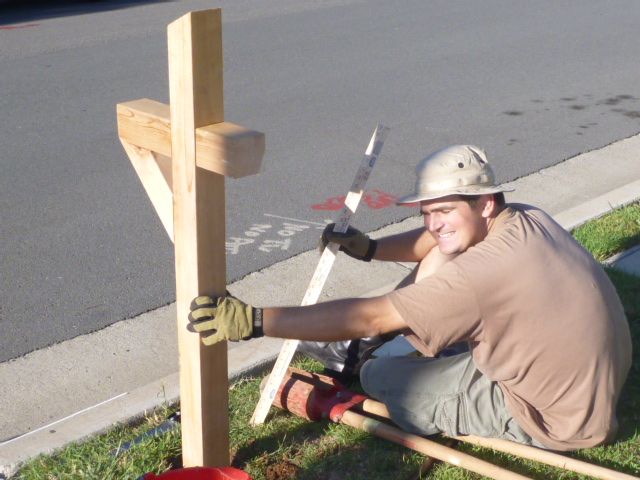
Therefore Ben decided to just saw off the extra inches.
And as always Lucy stayed with us to supervise!

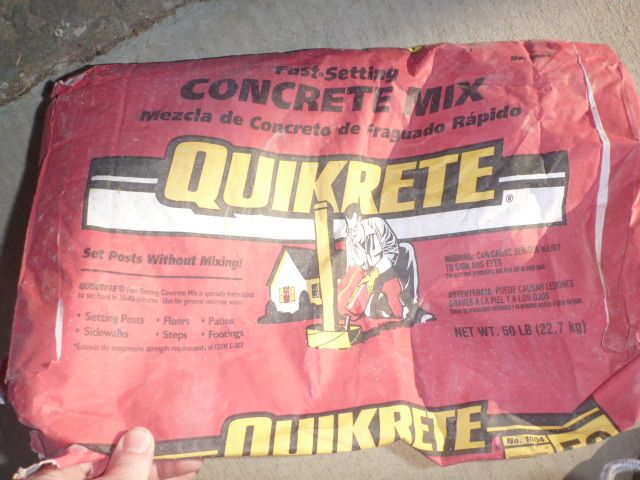
After the hole was dug we filled the bottom few inches with Quikrete (bought this at Home Depot too), then stuck our post in and filled around the post with the Quikrete till 4" from the top of the hole. My dad recommended this stuff because it is great, all you have to do is add water and it turns into wet concrete with no stirring and dries quickly too!
Ben added the water and I held the post with a level to make sure it was nice and straight. Although we realized I didn't really need to because it wasn't moving, so I got to take a picture instead!
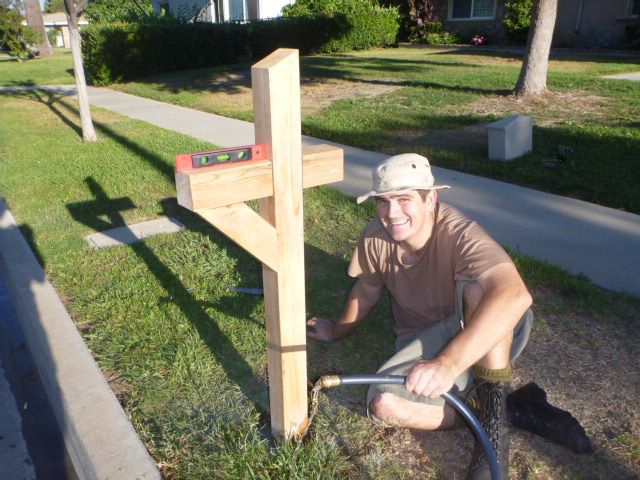
Then I primed the post using some Kilz primer we already owned.

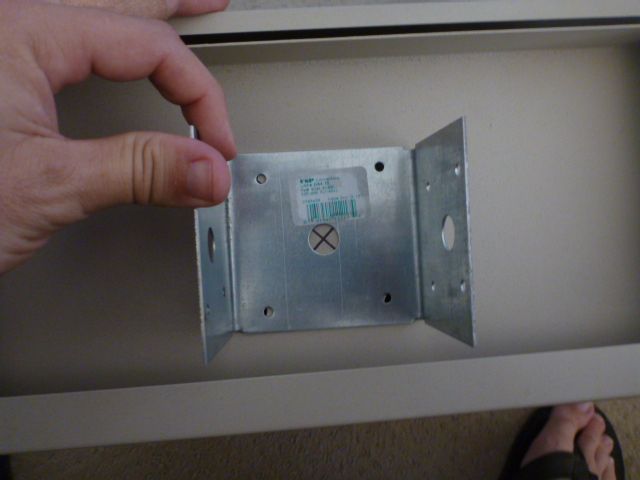
Next up came the challenge of anchoring the mailbox to the post. I had to pick the "special" mailbox that was different. It came with NO hardware for mounting it, wasn't that nice! So we had to make up our own plan for how to attach it to the post. First challenge, the holes in the bottom of the mailhouse were 3" apart. This worried us, because we didn't want to drill into our post too close to the edge and split the wood since the post was 4" wide. So mounting directly to the post was out.
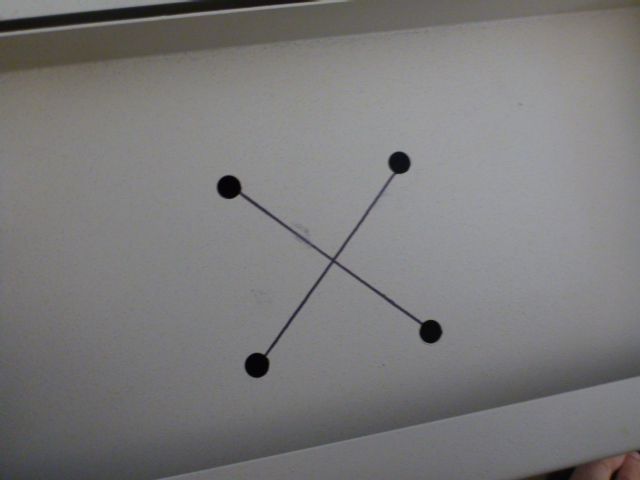
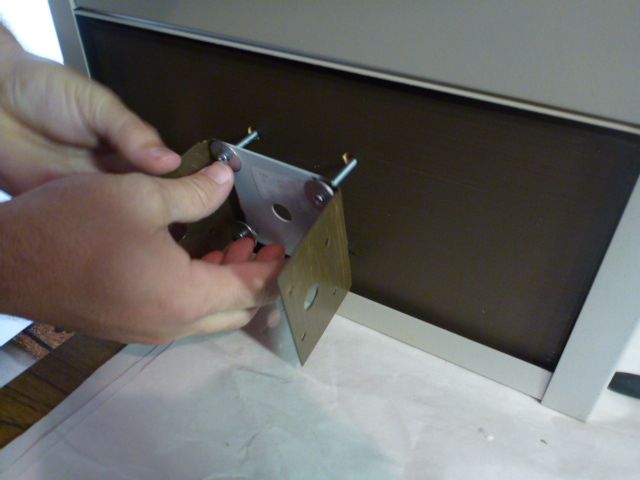
We purchased a U shaped bracket at Home Depot but the holes did not line up with the mailhouse. Ben drew an X between the pre-drilled holes on the house to find the center, then lined up the bracket center to it. He taped it on and flipped the house over, opening the door he was able to trace through the current holes.
Now you can see where the new holes are going to go (they are the black circles).
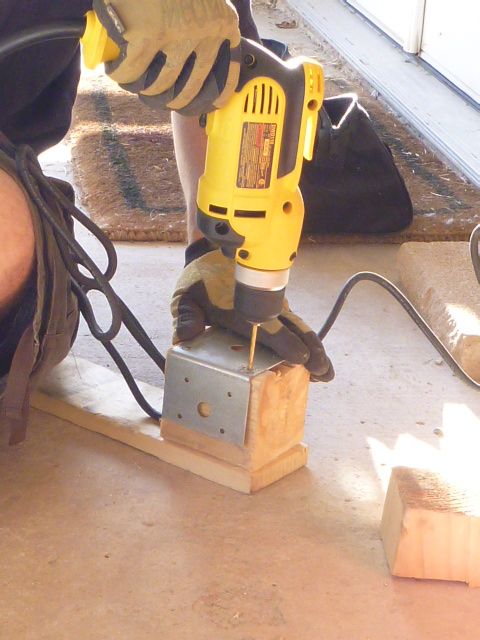
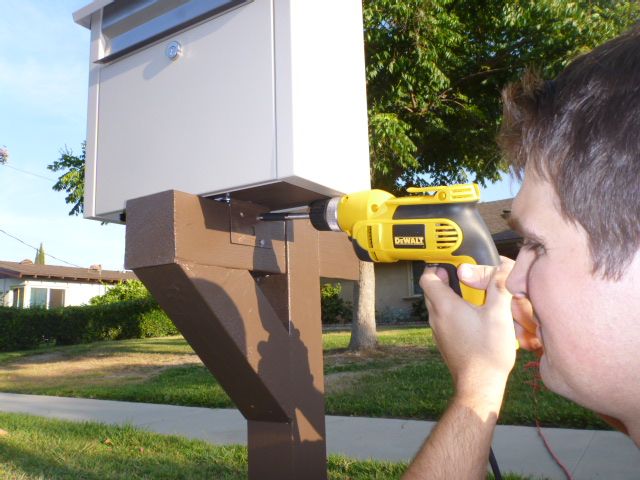
Ben then used his hand-dandy drill to drill the new holes in place. That extra piece from the mailbox post that we sawed off came in hand for giving him something to rest the bracket on!
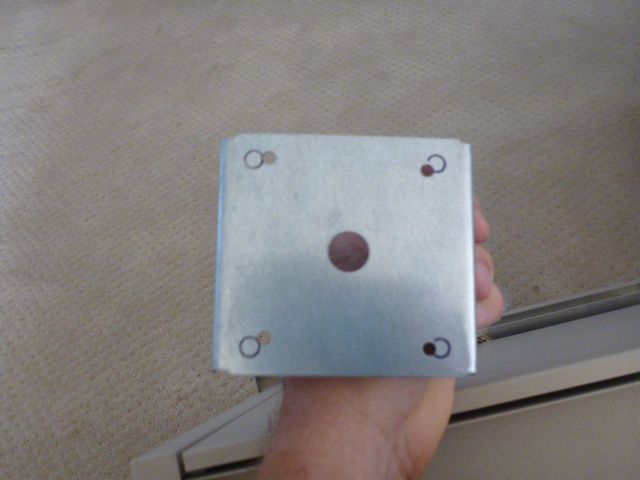
Ta-da new holes!

Another fun feature was that they raised the bottom of the house an inch from the edges. Why? I don't know! Luckily we have scrap wood lying around the garage, so Ben cut one to fit and I painted it the same color as the post. Then Ben drilled holes through the wood at the same spots as the brackets/house. Also, I painted the sides of the bracket the same brown color so it wouldn't stand out all metal and shiny.
We added washers to both ends of the screws to help them stay in place and then tightened them down on the inside of the mailhouse with bolts.
Then all we had to do was screw it into the post!
The screws flat ends stick up a little bit on the inside, but I figure it won't hurt the mail.

Here's a back view of the mailhouse on its new post.
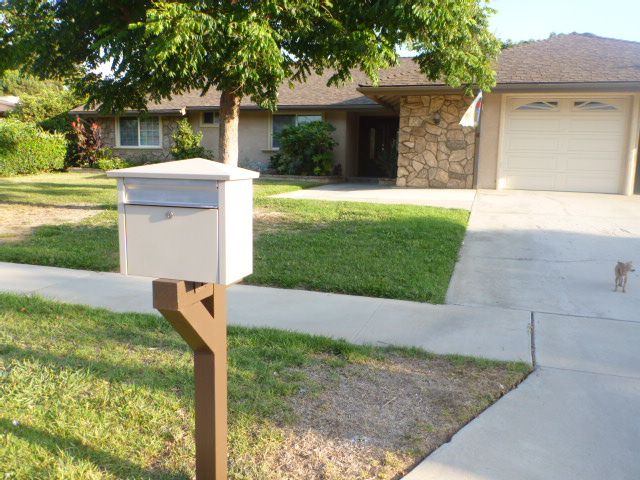
And best for last, the finished product! We love the way the roof lines of the mailhouse match the real house. If you look closely you can find Lucy, still out there supervising!
Here is the final breakdown of supplies needed and what it cost us:
Post Hole Digger $3
Quikrete $5
Mailbox Post $30
Mail House in Beige $80
Mounting Bracket $5
12 Screws $1
8 Washers $1
4 Bolts $1
Kilz Primer $Free
Paint in Cabin Plank $13
Hand Saw $Already Owned
Drill $Already Owned
Total = $139
Quikrete $5
Mailbox Post $30
Mail House in Beige $80
Mounting Bracket $5
12 Screws $1
8 Washers $1
4 Bolts $1
Kilz Primer $Free
Paint in Cabin Plank $13
Hand Saw $Already Owned
Drill $Already Owned
Total = $139
I hope our little how-to has helped you. And if nothing else, in case you are purchasing a home with a mailbox at the house, now you are warned what fun awaits you! Anybody else have any similar surprises when they bought their home?

No comments:
Post a Comment