Boo-boos happen. Ben's 1999 Camry had a boo-boo this year. It bumped into the parking garage post at the apartment and shattered the blinker light. We finally decided that we were not going to pay someone to fix it for us, but that we would fix it ourselves. And you know what? It was super easy to do! Ben is going to share with you how we fixed it:
My sad car. You can see how I managed to crack the clear cover to my signal. Luckly my bumper survived!
I found the necessary replacement part made by a third party on Amazon, of all places. A few days later I got a small package. Note that with the Camry, you replace the whole assembly to replace a light.
The upside of the modular construction is the ease of maintenance, even for someone relatively untrained in the automotive arts.
The first step is to remove the old damaged part out. To do this, you carefully pry up the plastic pin that holds it in place.
When the pin is up, you simply pull the old piece out.
Remove the power cable off the back of the old light.
...and reattach to the new part.
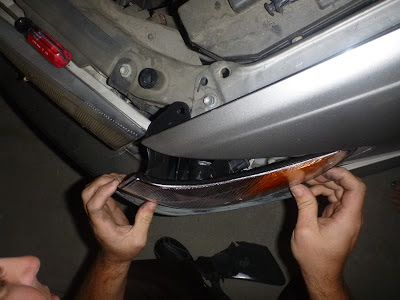
Then gently push the new light assembly into its place.
The trickiest part is inserting the new light assembly. On the far edge of the signal there's a plastic tab. It needs to align with a hidden slot. Once these align properly, it is easy to insert the whole light into its socket.
Tap the pin back in (I used the back of my screw driver).
And that's it, you're all set to go! You'll now have a happy car!


No comments:
Post a Comment