

We've had Disneyland passes for the past year, but they'll be expiring soon and every time we'd see Mary Poppins in the park she'd be dying to meet her. She just loves playing dress up and wearing the little princess dresses that she owns, but that Halloween costume was just too hot to wear to a day at Disney. I knew that before our passes expire I HAD TO buy or make her the white dress that MP wears in the chalk painting scene - which is the one she always has on in the park.
Well, I searched and searched the internet for new and used toddler sized costumes but the best I could find were the ones on Etsy - but lets be real here, I could not justify spending that kind of money on a costume that she'd only wear once. (Except I should have known better, she hasn't only worn it once, she's worn it every day for the past week since I made it and there is no end in sight).

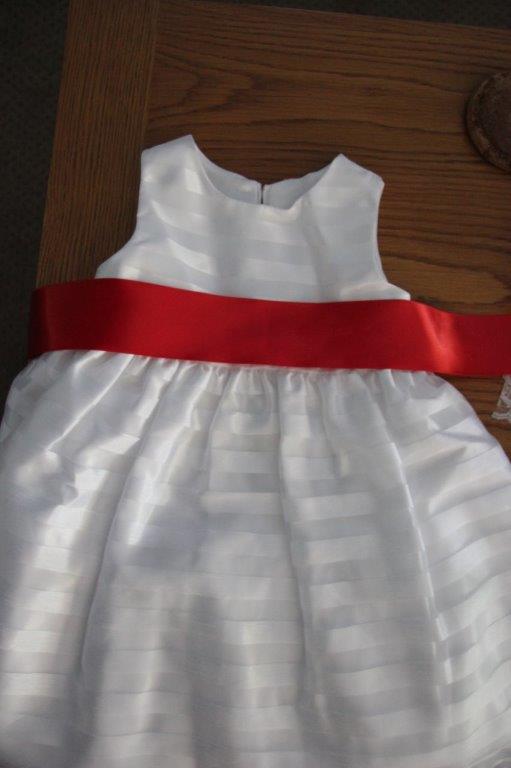
The real secret here was that I DID NOT SEW THE DRESS! I totally cheated and bought the dress on clearance for only $10 at Burlington Coat Factory. And I was actually able to whip this whole costume out in only 2 days! Here is almost everything I used to make this costume:

Supplies:
- White Dress
- White Hat (from Dollar Tree)
- White Shoes
- 2 Pieces of White Craft Felt
- 1 Piece of Red Craft Felt
- 12" of Piece of Chiffon (cut off the bolt)
- 12" Triple Layered Lace
- 12" Single Layer of Lace
- 1 spool of 2.5" Red Satin Ribbon
- 1 spool of 1/4" Red Satin Ribbon
- 1 spool of 1/8" Nylon White Trim (I can best describe it as satin rope)
- 6" of Piece of Tule (cut off the bolt)
- 1 package small roses
- 10" of velcro (not pictured)
- Red and White Thread (not pictured)
- Glue Gun (not pictured)
I began by cutting off the flowered waistband from the dress and measuring how much red ribbon I'd need to go from one side of the zipper around to the other side.
Then I trimmed the ribbon to give it a nice point in the middle, the ribbon is folded in half to make sure it's nice and even. To keep the ribbon from fraying I melted the raw edge using my lighter.

Next I cut small pieces of the white nylon and taped them to the belt. Although after I held it back up to the dress I realized that I needed to spread them out more, I suggest an inch between white stripes.

To attach the white ribbon I chose to whip stitch them in place, but honestly you could get away with hot gluing them. Make sure to use tweezers so you don't burn your fingers though!

Then I pinned the tripple layer lace in place, folding it every 1/4" to give it pleats (ignore red/white ribbon placement - it was after this I decided to take that apart and spread them out more).

Here is a close up of the pleating, I started by pinning the raw edge at the collar of the dress, went down and pinned the center right as it touched the red belt. Then I added the pleating on both sides to make it fit.

I decided that the dresses needed some form of sleeves, but you could totally skip this step and the dress will still look great. The real Mary Poppins has full length sleeves with red ribbon at the bottom. I didn't think this would be comfortable for my two year old so I opted for loose flowing sleeves made of chiffon. They were pretty easy to add too. I started by folding my chiffon in half and placing a sleeve pattern piece on top. I was prepared to wing it and just cut this shape out by hand when I remembered I had this piece available. I happened to already have this dress pattern on hand but honestly the shape is really simple - the top reminds me of a bell curve (think grading scale from school), then it's two inches wide straight down, and a straight line across the bottom.

After it was cut out I melted the edges of the whole piece using my lighter to prevent fraying. Originally I was going to hand sew a rolled hem to the sleeve, but I chose the shortcut way so I could get some sleep. Yeah it would have looked prettier, but I look prettier without bags under my eyes...

Then I folded each sleeve in half and sewed down one side.

Then I used a basting stitch to gather the top edge of the sleeve.

I pinned it to the inside of the dress and hand stitched it in place using a back-stitch only going throuigh the lining of the dress so it wouldn't show on the outside.

The final step I totally forgot to take close up pictures of was adding the little red bows all over the dress. There was no measuring here, I just eyeballed it. I took that 1/4" red ribbon, cut pieces about 6" long and tied them into little bows, then I pinned them periodically around the dress, adjusting as needed based on the way the dress flowed. Then I used my red thread to stitch them from the inside (totally could have cheated and used hot glue here too though). To see them pretty close up just scroll to the end of the tutorial section.

I took the tule, folded it in half length wise and found the center of that - that spot went directly under her chin then wrapped up to the top where I tied it loosely. The tail of the tule I then left fluffy in the back of the hat. Now I used a light whip stitch to attach everything to the hat, but two spots ended up ripping out during our day at the park, so I ended up emergency attaching them with safety pins. You could try hot gluing it to the hat, but be warned the glue will come through it so press with caution.

The next accessory was the spatterdashes (aka spats) that went on top of her white shoes, technically the real Mary Poppins wears white boots with these on top, but it was way more cost effective to buy her little white dress shoes. To make the faux buttons I traced a dime on the felt 10 times - 5 for each side, and cut them out.

Then I pinned them down one side of the white felt to see how I liked the spacing, they are about 1" apart.

Then I wrapped the felt around my daughters leg, positioning it to overlap at the top and separate at the bottom.

The felt was baggy around the ankle so I added a tuck on the inside of her leg.

Then I pinned the Velcro behind on the backside of where the faux red buttons are and along the line where it would match on the other side, notice it is not a vertical line on the right, but this is how it fits the shape of her calf. The top half of the picture is the outside of one, the bottom half of the picture is the inside of the other one. For me the trickiest part was reversing the placement of everything from right to left leg.

I removed the red circles to sew the Velcro in place, then I simply hot glued them on. You could totally cheat all of this by hot gluing everything.

This is how they look closed and ready for use. I planned on only having my daughter wear these for pictures, assuming they might get hot and itchy, but she surprised me and wanted to keep them on the whole time. After a day of walking around in them I did notice that the back portion of her spats got a little dirty, they didn't drag on the ground but still they managed to pick up a little dirt, not bad though.

They looked quite cute on her, and really completed the look!


I simply tied the bows on the inside of her wrists. This was one of those accessories I thought she would want to take off, but again she surprised me and kept them on almost the whole day!


Carolyn and Peter Pan formed a special bond.


These next 3 pictures are actually from when we were waiting for our bus to come take us to Disneyland in the morning...


And of course we had to recreate the carousel scene!


She is adorable! You did an amazing job! I love how you were able to do this from a regular dress.
ReplyDeleteThank you so much!!! <3
DeleteSo cute! It's a beautiful dress, why wouldn't she want to wear it all the time? (my daughter would do exactly the same)
ReplyDeleteThank you for sharing at The Really crafty Link Party. Pinned.
This is just adorable! It will be one of my features on Monday for the Summer Fun Link Party!
ReplyDelete