
Back to the good news, this cake survived and thrived! Here he/she is:

I began with three boxes of white cake mix.

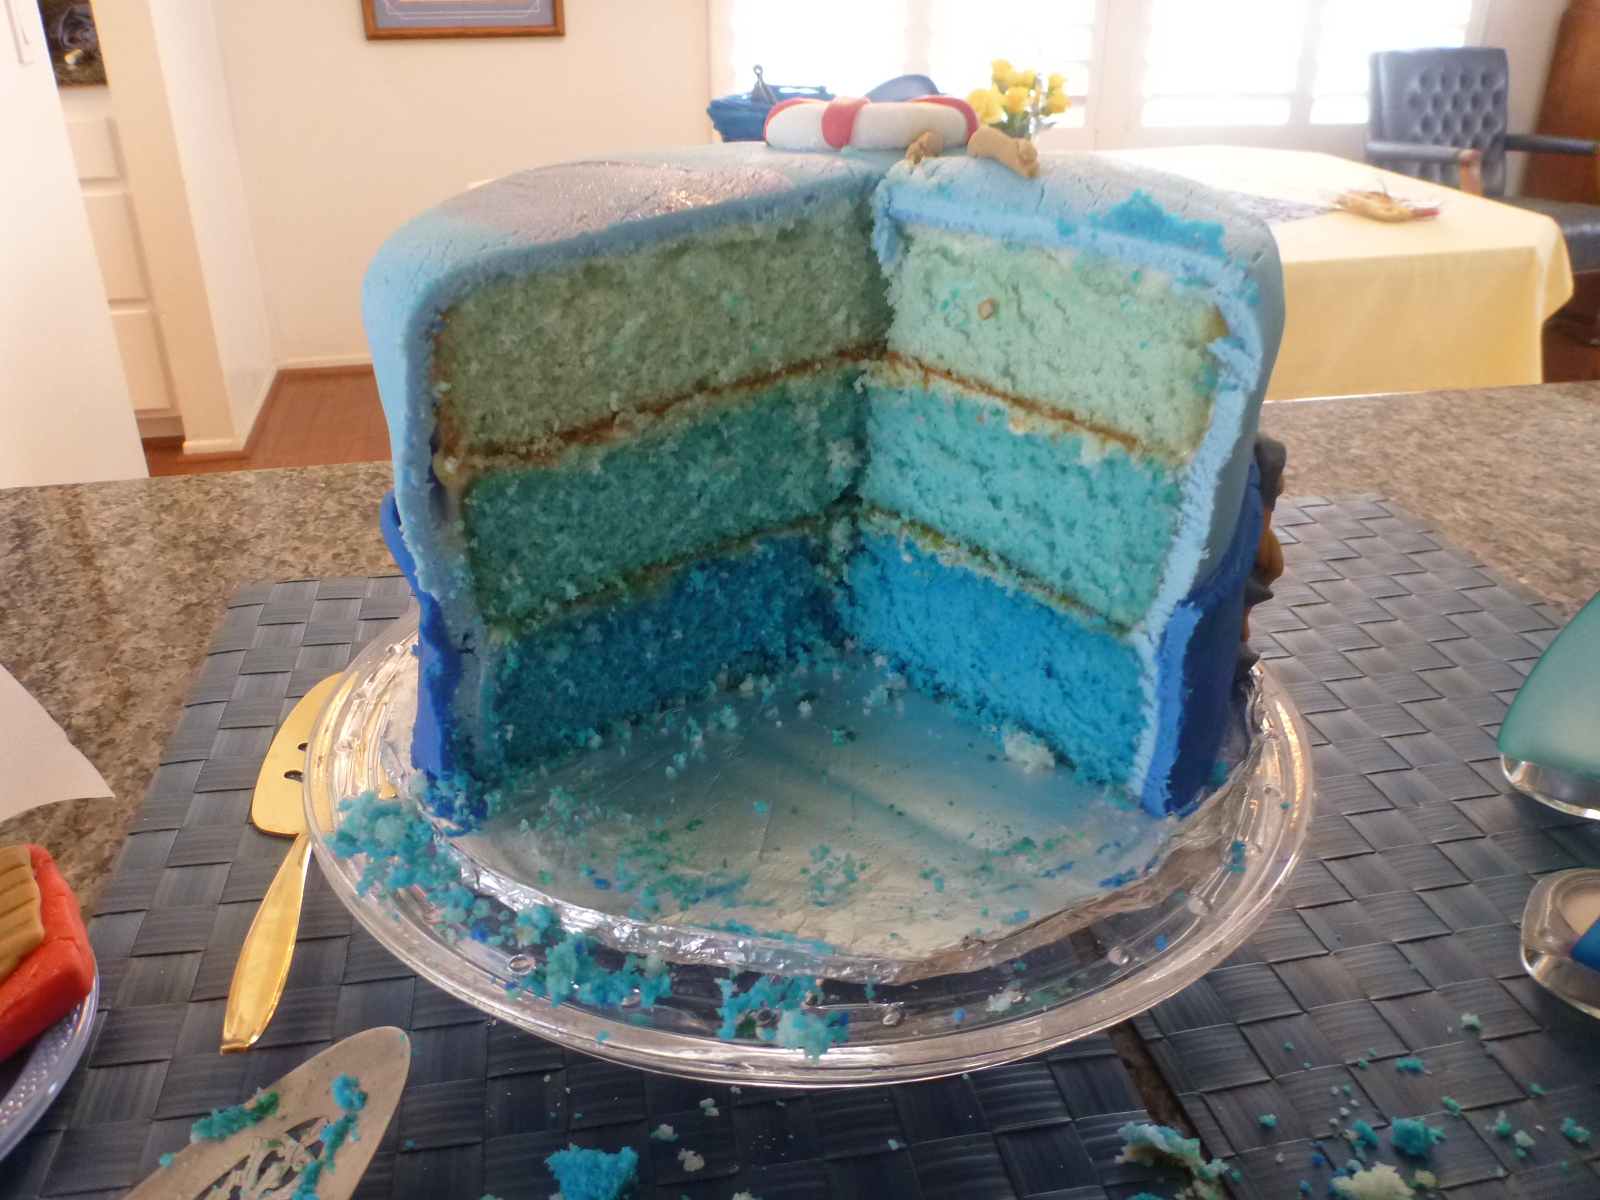
I mixed them up following the directions, but before I put them in the oven I added varying degrees of blue food dye. My goal was to create an ombre effect with the cake - light, medium and dark.


I bake my cakes using a spring form pan, the reason - it is my tallest pan and I like to create the tall cakes. So I pour all my batter in at one time and bake for 55 minutes.

Here are the three different shades of blue cakes. The yellow crust makes it hard to see, but they are very blue!


For the filling I made a cream cheese frosting = disaster! I tried everything to stiffen it up, but to no avail. It was a miracle the cake didn't slide apart! I also covered the entire cake in a thin crumb layer of the frosting, but you don't want to see a picture of that mess, it was BAD, drips everywhere...

I had two very interested dogs waiting for crumbs to fall!

Next began our fun with fondant time! I made the fondant using this recipe from AllRecipes.com and then I put Ben in charge of the boat, and then in charge of the anchor and since he was doing such a great job in charge of the life saver too!


He made the deck by using my fondant roller and the flat spacers.

We attempted to make a sail using the fondant too (I would have preferred gum paste but didn't want to make a run to the store). Unfortunately when I attempted to stand the sail upright, it ripped in half. Always have a back-up! I was sooooooo glad we made a backup sail out of parchment paper!

THIS WAS THE MOST PAINFUL/TEARFUL PART OF THE PROCESS - laying the fondant on the cake. We tried everything!!!!! We Googled and Youtubed it, it was a disaster! But around midnight after our 6th attempt, together we achieved the impossible, and the fondant landed on the cake!!!! It had been manipulated way too much and was cracking all over the place, but it didn't matter, it was ON!

I wrapped it up with cling wrap, stuck it in the fridge and called it a night. In the morning, feeling a bit more refreshed, I added some more blue dye to the leftover blue fondant and rolled it out to make waves. I used a pizza cutter to create these nice rolling waves.

Then onto the cake they went, just add water to make them stick together!

Ta da! The waves helped to hide lots of fondant sins!

Ben resumed work on his life saver and anchor, don't they look fantastic!?!?!?!

Onto the cake they went, and it really started to come together!

Oooooo, I just love the anchor!!!!

I make it a rule to always take a picture of the cake before I attempt to transport it. We set it up with the mock sail - which ended up being the real sail!

And it actually made it to the baby shower in one piece, amazing!!!!

I love how surprised everyone was to find a blue inside! **Tip: I wish I would have realized how the bottom of each layer would show the brown edges from baking, next time I would cut both the top and bottom off.
And quite delicious too!!!

Now the real question is, will I do fondant again? Maybe with time I will forget how terrible of a time I had getting it onto the cake in one piece, so we'll have to see...


No comments:
Post a Comment