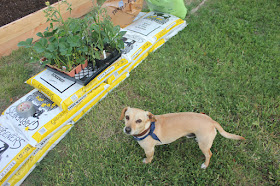
Our house already had a designated garden area that gets lots of sun throughout the day, so we decided to use this area for our own garden.
Using some unused planter boarders that were lying around in the yard, we created the shape of the garden bed we imagined. This helped us get a feel for the size of the box.
Our plan was to make four "L" boxes just turned for each corner of the garden. Here are the measurements for one of the boxes. You could make your own box in any variation of this, just make sure your math all adds up... Each box is two boards high, we wanted our boxes to be 1' tall so we bought our boards in the 2"x6" size. We also purchased a 2"x2" board and had him cut that down to 11" (since technically the box is not really a full foot tall, due to the lumber measurements, it is only 11" tall.
We purchased all of the side wood in either 8' length or longer and had the home improvement store person cut them down to all of our sizes (since we don't own a power saw, and to make it all fit in the car). This also saved us lots of time when we got home, it meant we were ready to assemble right away! Ben laid out the shape with just one level of boards.
Then we attached one end of the two boards to the 2"x"2 support using outdoor deck screws.
Ben worked out a genius way of holding the boards in place, simply sit on them!
Now that we had one end of each side of the box attached to the support we were ready to attach them together at the corners.
We stood them on their sides made sure everything was square.
Then Ben clamped them together.
And screwed them together.
He intentionally staggered the screws so that they wouldn't collide from the two sides.
Here is what the corner looks like from above.
And from the side.
One box done, 3 more L's to go!
You may have noticed that our garden area was kind of grassy, well we didn't want any of that grass growing in our nice new food boxes so we scraped off the top layer.
Ben outlined the shape of the box and then worked his way through.
I wanted the dirt under the box loosened for all those deep roots going down, so I got my pointy shovel and started digging too!
Teddy asked, when are you going to plant this stuff? Our local nursery was having a half off sale, so we purchased some strawberry and tomato plants that we could plant for some instant gratification.
But first we needed to fill our boxes, I used a combination of steer manure (for fluff), perlite (for good drainage), vermiculite (for good moisture retention) and a layer of organic potting soil for the top layer where the plants will be starting out. We plan to add our own homemade compost as we go too.
We had a lot of space to fill but not a very big budget, since these bags of manure were only a $1 and recommended for use by my dad we bought lots (it took about 15 bags per box). We fondly named this our great wall of poo!
After filling our box up we still had about 5" to the edge of the top, this is intentional since as I mentioned over time we intend to add compost which will raise our soil level.
Here is what our garden looked like after we finished building the 4 "L" boxes and a small rectangular box.
We used those same planter boarders we found to create an entrance to the garden along with some boxwood plants.
I hope this helps those of you out there interested in building your own garden beds. It was super easy and you could build your own in other shapes to fit your garden area. Go for it, and we can share our experiences with each other!


Wow! The planter boxes turned out so gorgeous. What fabulous veggies you will have!! Congrats on getting this huge project finished..... Happy Easter to you and yours…. :)
ReplyDelete“hugs” Crystelle
Crystelle Boutique
Thank you so much Crystelle! I hope you have a wonderful Easter too! :)
DeleteThat L-shaped raised bed you did there looks amazing. That would really be perfect for open lawn corners. Those planter boarders as garden entrance markers is a wonderful idea. The first time I made raised beds, I made some bad choices and it turned up a disaster because I knew more of gardening itself, than woodworking. But I learned better, and I hope others would too, after reading your post. Thanks for sharing!
ReplyDeleteBethel Woodard @ Sollecito
Thank you so much! It definitely is a learn as you go process! Glad you had good results in the end and hope you have success in the future! :)
DeleteHi! I am hoping to build at least one L-shaped raised bed soon! Where, oh where, did you find vermiculite? I haven't had a garden for a few years, but when I looked about three years ago, I couldn't find vermiculite anywhere! I went to several garden stores, called around, looked online, and...nothing. I'm wondering if it is easier to get a hold of now. I hope so.
ReplyDeleteI'm excited that you're going to build one too, you'll love it!!! As for vermiculite we were able to buy it at our local Home Depot, but if your's doesn't have it in stock I think you can order online and have it delivered to the store, here it is online: http://www.homedepot.com/p/THERMOROCK-2-cu-ft-Medium-Grade-Vermiculite-Soil-Amendment-489702/202187625
Delete